
When it comes to appreciating Japanese swords, one is tempted to begin by memorizing the names of the parts. But what works first is to stand back and see the overall shape as a single whole. The single curve the blade makes, the difference in thickness between the base and the tip, the way the tip comes together. Simply comparing these three makes the differences in character from sword to sword appear more clearly than you might expect.
“Sugata” Is Not the Sum of the Parts
Sword appreciation is described as considering the overall form, or taihai, together with details such as steel surface and temper pattern. Commentary also explains period tendencies in the position of curvature and the difference between width at the base and near the point (Hyōgo Prefectural Museum of History: Sword Form, Steel Surface and Temper Pattern).
What matters is the wording “there are tendencies.” One cannot declare from a single sword that, because the form is similar, it belongs to this period. Tendencies are like a map that emerges when many examples are set side by side, and individual works move freely across that map. While you are a beginner, I think it is enjoyable to use them not as a tool for guessing the date but as a yardstick for noticing differences.
What Is the Word Sori Looking At?
The word “curvature” (sori) tends to be used loosely, but viewing guides specify where it is measured. Imagine a straight line between the munemachi, the spine-side notch at the blade–tang boundary, and the point; then measure the greatest distance between that line and the spine (Kyoto National Museum: Japanese Sword Viewing Points).
All you can do at the venue is draw this line in your head. You will not actually hold a ruler up to the sword, and measuring an on-screen photograph with a ruler does not yield a meaningful number either. This is because photographs are not uniform in shooting conditions or in the size at which they are published, so a length on screen cannot be converted into an actual dimension. Check the figures in the museum’s official information, and use your eyes for observing position: “roughly where does it look farthest from the straight line?”
Setting the Figures for Two Blades Side by Side
Let us set side by side two blades published by the Tokyo Fuji Art Museum, following the museum’s descriptions.
| Item | Tachi, signed Ichi (一) | Katana, signed Nagasone Okisato Nyūdō Kotetsu (長曽祢興里入道乕徹) |
|---|---|---|
| Museum’s description (school / province) | Fukuoka Ichimonji (school) | Musashi (province name) |
| Period | Mid-Kamakura period (13th century) | Early Edo period (17th century) |
| Blade length | 72.0cm | 70.5cm |
| Curvature | 2.2cm | 1.5cm |
| Museum’s explanation of the form | Wide, with a pronounced koshi-zori. The chū-kissaki (medium point) is compact, becoming ikubi | Shallow sori, with a slight koshi-zori |
(Sources: Tokyo Fuji Art Museum, Tachi with the Signature Ichi; the same museum, Katana with the Signature Nagasone Okisato Nyūdō Kotetsu)
Note that the photographs shown in this article are not to the same scale, so actual dimensions cannot be compared by their lengths on screen.
The difference in blade length is only 1.5 cm, but the sori is 2.2 cm and 1.5 cm, which is quite different as a proportion. What should not be overlooked here is that the term koshi-zori appears in both explanations. One cannot simply sort them, with the deeper sori as koshi-zori and the shallower one as some other type. The depth of the sori and the position where the sori appears most strongly are two observations that should be made separately.
The Balance of Base and Tip Widths and the Kissaki
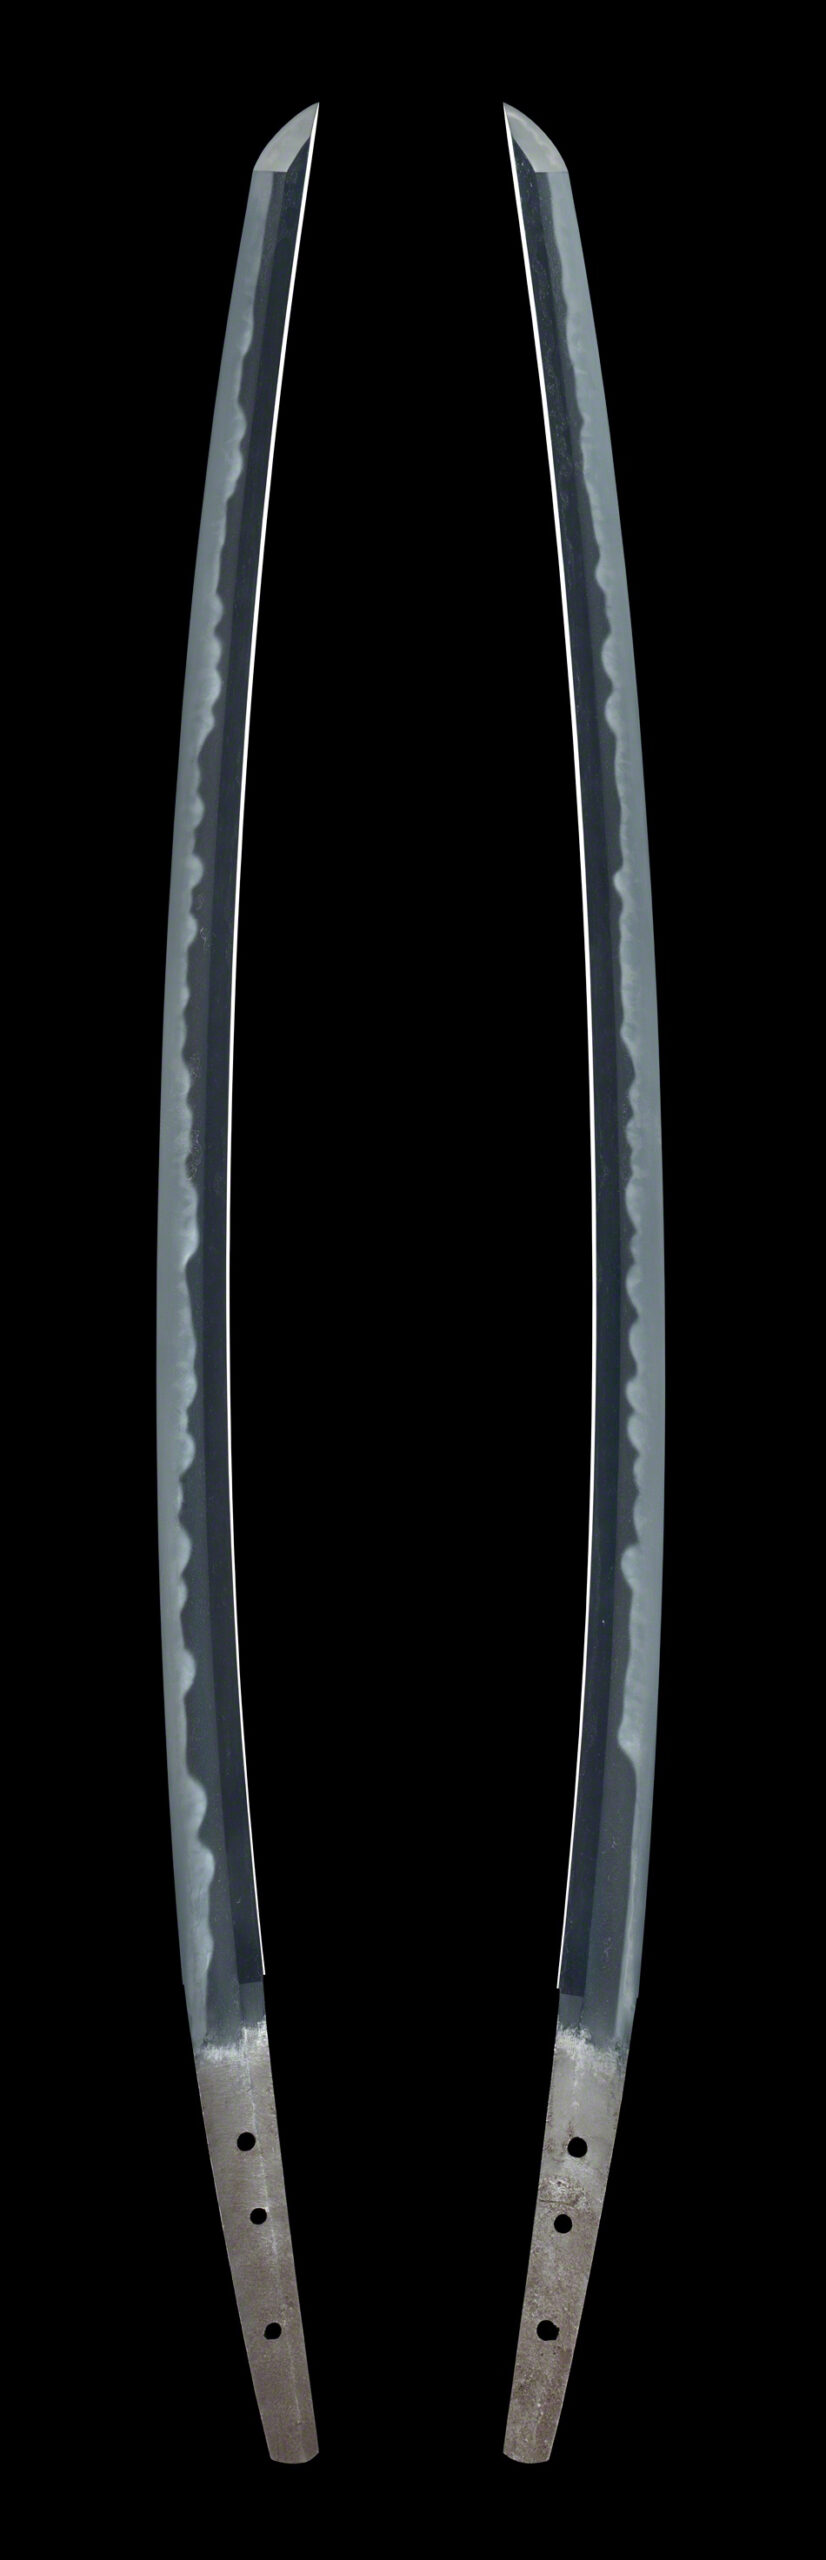
Tokyo Fuji Art Museum Collection (CC0) / Collection Record
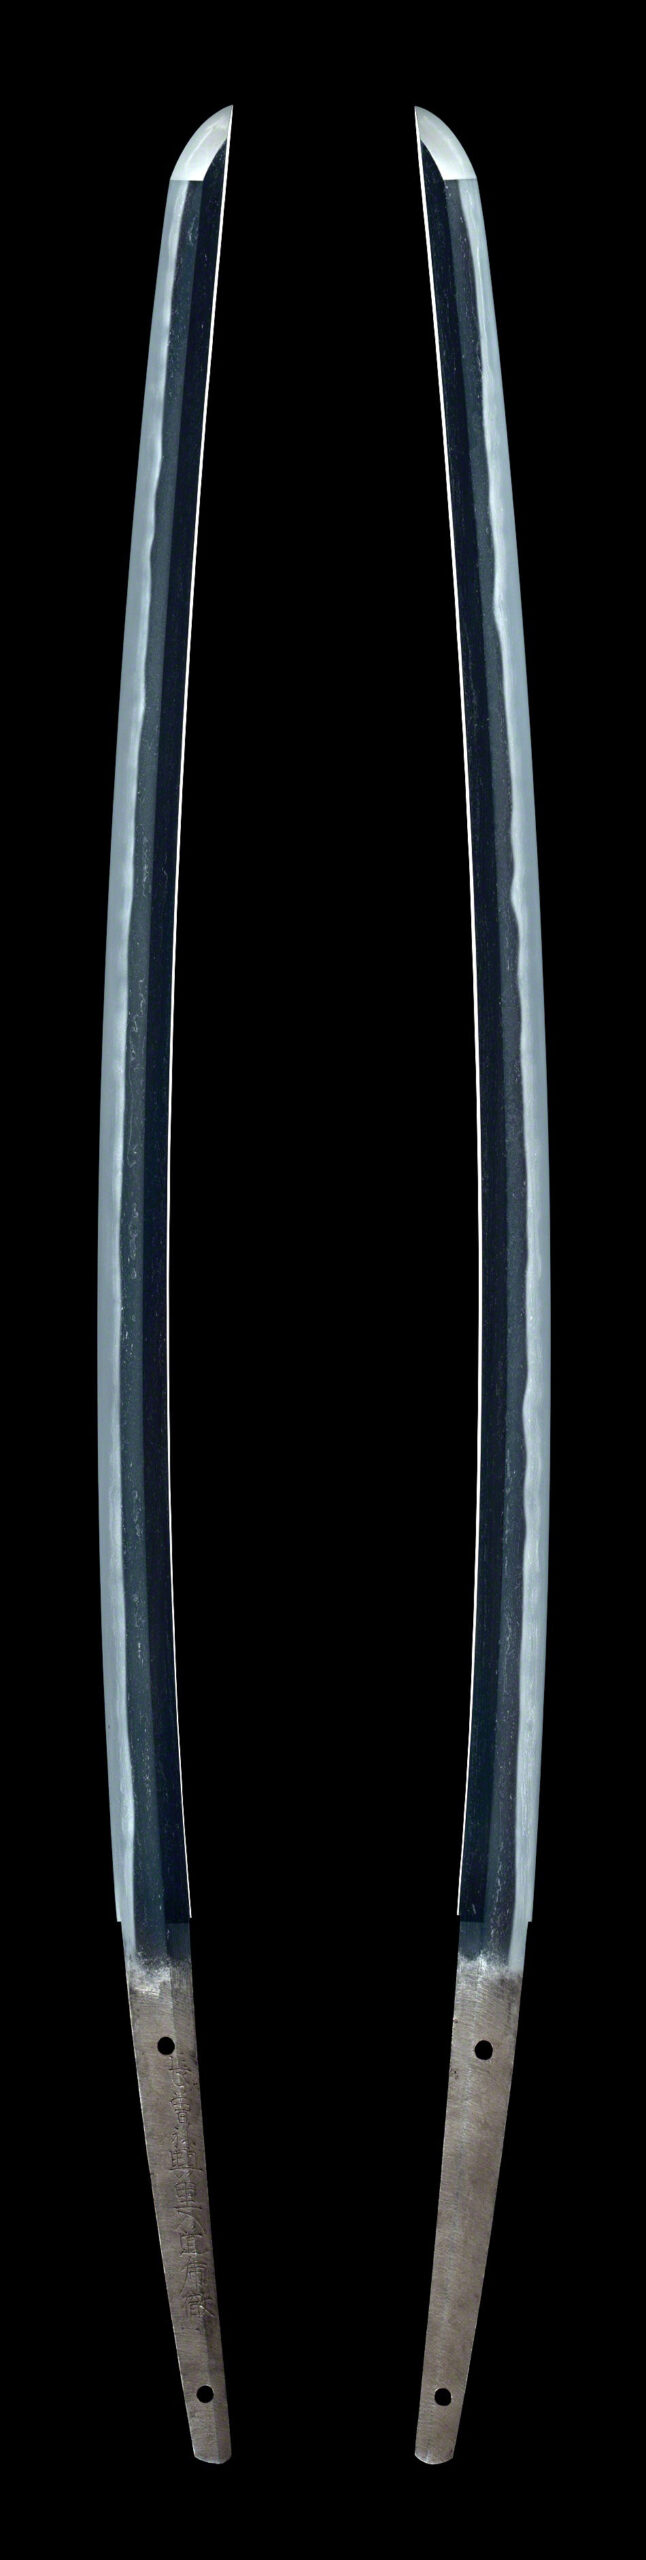
Tokyo Fuji Art Museum Collection (CC0) / Collection Record
When comparing the two photographs, first look at the width at the base, and then follow with your eyes how the width changes toward the tip. One is wide, with a kissaki at the tip that appears short and compact. The other is slender overall, with a gentle peak to its curvature. If you check how these differences in impression connect with the museum's text, the words become your own.
Work around the Kanbun era in the early Edo period is described as tending toward shallow curvature and a blade that narrows from base to point (Japanese Sword Museum: History). This is a tendency, however, not a basis for dating or authenticating an individual sword from its form alone. For period terminology, also see Kotō, Shintō and Shinshintō: The Differences.
Points to Note When Viewing Photographs, and the Order of Viewing
Each of the two photographs above shows the front and back of the same single blade placed side by side. Although two sides appear next to each other, these are not two blades. For the figures, please refer to the official information in the table.
As an order of viewing, we recommend the following flow: (1) step back and trace the whole curve; (2) compare the width at the base and at the tip; (3) look at how the kissaki comes together; and (4) only then move down to details such as the jigane and the hamon. In your observation notes, simply writing down two items, “whether the peak of the curvature is toward the base or around the middle” and “whether the width decreases sharply or gradually,” will give you material for comparison with the next blade.
Looking at overall form is a way to describe a work's character in your own words, rather than simply classify it. For examining details, also see Enjoying Japanese Swords.